The Print Shop 4.0 User Guide
This User Guide is designed to help you learn the software.
Be sure to also check out the
Video Tutorials and the
Blog for
additional ideas. To access the User Guide, either click
on a topic to the left, choose a commonly accessed topic
below, or search for a topic above.
In addition to the information available in The Print Shop 4.0 User Guide, Technical support is also available if you encounter an issue with the software. Solutions to common technical issues can be found using these links, or if necessary report a problem to our Support team.

Font Tools

Changing the Font
To change the font first insert a
text box. Once a text box is inserted you can set the font by
doing the following:
- Click the Text you want to edit. The Text Tab will then
become active.

- Use the drop-down box to select the font you want to
use.
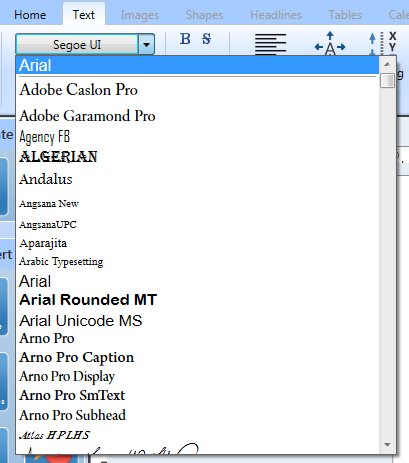
Note: You can also change parts
of your text by highlighting that portion of the text with your
mouse then following the steps above.
Please Note: The
available Fonts will depend on the fonts that are installed on your
computer. The screenshot above is NOT
representative of Fonts that come with The Print Shop 3.5.
Changing the Text
Color
To change the Text Color start
by inserting a text box. Once a text box
is inserted you can set the color.
- Click the Text you want to edit. The Text Tab will then
become active.

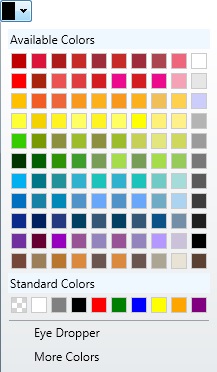
- Use the drop-down box to select the color you want to
use. You can also use the Eye Dropper tool to select a color
from anything you click on, or the white and grey checkerboard
color to choose a transparent color.
Note: You can also change parts
of your text by highlighting that portion of the text with your
mouse then following the steps above.
Changing the Text
Size
To change the size of the text start
by inserting a text box. Once a text box
is inserted you can set the text size.
- Click the Text you want to edit. The Text Tab will then
become active.

- Use the drop-down box to select the size you want to use, or
use the + and - buttons to increase or decrease the font size
of your text.

Note: You can also change parts
of your text by highlighting that portion of the text with your
mouse then following the steps above.
Using
Text Font Styles
The following text styles can be
applied to your text in The Print Shop 4.0.

Save
Text Font Styles
The Print Shop 4.0 allows you to save
text font styles, making it easier for you to add a favorite text
font style to your project.
To Save Text Font Styles:
- Create a Blank or Template
Project.
- Add a Text Box and begin entering
text.
- Click the Text you want to
edit. The Text Tab will then become active.

- Select the text in the Text Box that
you want to customize.
- Edit the Font and Font Style for that
text.
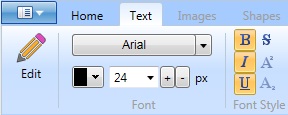
- Click on the Text Box, and select the
Save Text Style feature available in The Print Shop ribbon.

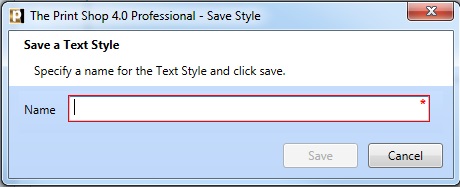
- Enter a name for your personalized
text style.
Load
Text Font Styles
The Print Shop 4.0 allows you to load
text font styles, making it easier for you to add a favorite text
font style to your project.
To Load Text Font Styles:
- Create a Blank or Template
Project.
- Add a Text Box and begin entering
text.
- Click the Text you want to
edit. The Text Tab will then become active.

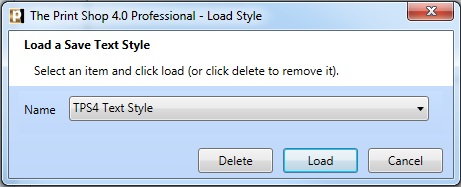
- Click on the Text Box, and select the
Load Text Style feature available in The Print Shop ribbon.

- Locate and choose the saved text
style that you would like to use for this particular text box.
Back to Working with Text...
or
Continue to Paragraph Tools...