
Editing Headlines

To change the text of a headline,
click on the headline to select it and then enter the new headline
text in the Enter Headline text below box under Headlines in the
Ribbon Tabs.

The following options are available in
the Ribbon Tabs under the Headlines heading:
Add Headline
Click on this icon to add a new
headline to the currently selected project page. See the Adding
Headlines topic for more information.
Enter Headline text below
Type the text for the headline in the
Enter Headline text below box.
Select Font
Change the set of text characters by
choosing a font from the Select Font drop-down list.
Headline Size
Change how large the headline
characters are by choosing a number from the Size drop-down list.
You may also type a size directly into the box (hit the Enter or
Return key to apply).
Line Spacing
To change the vertical space between
lines of text, click on the up or down arrows next to the number in
the Line Spacing value. Alternately, type a number between -3 and 3
directly into the Line Spacing field (hit the Enter or Return key
to apply).
Headline Style
Click on the B
(bold) or I (italic) to apply
the selected formatting style to the headline.
Rotate (by Degrees)
To rotate the headline, drag the
slider to set the angle of rotation. The number in the box at the
top right will show the angle in degrees. You may also type the
angle of rotation directly into the box and hit Enter/Return on the
keyboard.
Headline Opacity
This allows you to make the headline
semi-transparent (the original state of the text is 100% opaque -
not transparent at all). Drag the slider to the left to make the
headline more transparent. Drag the slider to the right to make the
headline more opaque (less transparent).
Fill Tab
There are a number of ways to fill the
characters in a headline: Solid Color, Gradient Color (a gradual
blend between two or more colors), Image, and Texture.
- Ensure that the Enable Fill box is checked. Clear the check in
the box to remove the fill.
- Choose an option from the Fill Type drop-down.
-
- Solid Color - Click on the Change Color square to select a
color for the fill. See the Choose Color topic for more
information.
- Gradient Color - Click on the Gradient Color square to change
the gradient settings. See the Gradient Tab topic for more
information.
- Image - Click on the Change Image icon to choose an image file
to fill the headline. In the Add Photo window, use the top of the
window to browse to the folder with your photos. Double-click on a
photo thumbnail on the right to select it.
- Texture - Click on one of the Texture Options to fill the
headline with that texture.
- Drag the Fill Opacity slider to increase or decrease the
transparency of the fill.
Stroke Tab
A stroke is a colored border around
the headline. The Print Shop for Macintosh provides the
following stroke options:
- Ensure that the Enable Stroke box is checked. Clear the check
in the box to remove the stroke.
- Choose an option from the Stroke Style drop-down.
- Solid Color - Click on the Change Color square
to select a color for the stroke. See the Choose Color
topic for more information.
- Gradient Color (a gradual blend between two or more colors) -
Click on the Gradient Color square to change the
gradient settings. See the Gradient Tab topic for more
information.
- Neon - Click on the Edge Color icon to change
the color of the outside of the glow. Click on the Center
Color icon to change the color of the middle part of the
neon effect. See the Choose Color topic for more
information.
- Glow - Click on the Glow Color icon to change
the color of the glow effect. See the Choose Color topic for more
information.
- Drag the Stroke Width slider to increase or
decrease the thickness of the stroke.
- Drag the Stroke Opacity slider to increase or
decrease the transparency of the stroke.
Shadow Tab
- Ensure that the Enable Shadow box is checked. Clear the check
in the box to remove the shadow.
- Click on the Shadow Color button to choose the shadow's color.
See the Choose
Color topic for more information on choosing colors.
- The pixel offset values (X and Y) values determine how far the
shadow stretches from the headline, and to which direction. Click
on the shadow in the area to the top right and hold the mouse
button while dragging to adjust the shadow's placement. Increase
the offset values to move the shadow further to the right (X) and
down (Y).
- Use the Shadow Blur slider to increase or decrease the
sharpness of the shadow's edge. Alternately, type a number in the
box.
- Drag the Shadow Opacity slider to adjust the transparency of
the shadow. Higher values for the slider make the shadow more
opaque (darker); lower values make it more transparent.
Alternately, type a number in the box.
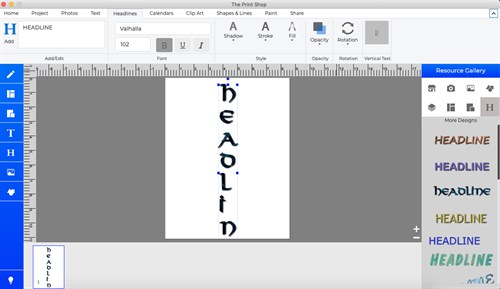
Advanced Headline
Vertical Text
With a headline selected you can press
the Vertical Text icon in the Headlines tab to switch the direction
of the headline to vertical. You will need to resize the bounds of
the headline so the shape is vertical before the headline will once
again be readable.
Adding Headlines
Or
Calendar
