The Print Shop 3.5 User Guide
The Print Shop 3.5 is designed to help you learn the software.
Be sure to also check out the
Video Tutorials and the
Blog for
additional ideas. To access the User Guide, either click
on a topic to the left, choose a commonly accessed topic
below, or search for a topic above.

Working with Page Numbering

Adding Page Numbers
To add page numbers to your project do
the following:
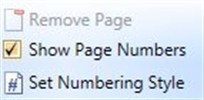
- Click on the Project Tab. Check the option for "Show Page
Numbers".

Note: To remove the page numbers
at any time, uncheck this option on the Project Tab.
Customizing your Page Numbers
In order to change how your page
numbers appear or on which pages they appear, use the Set Numbering
Style Options Menu. To open this menu do the following:
- Click on the Project Tab.
- Click on the Set Numbering Style Button.
- The Options Menu will Appear.

From this Menu you have the following
options:
The Font, Size and
Color of the page numbers can be changed just like all
other text inside The Print Shop. Click here for more information.
To Change the
location where your page number appear, select from one of
the following options:
- Upper Left
- Upper Center
- Upper Right
- Lower Left
- Lower Center
- Lower Right
Each of these options corresponds to a
section of the page.
To Set the Starting
Page for your page numbers, enter the page number where
you want the numbering to start.
If you begin numbering the pages on
page two, page two it will use 1 for its page number. This is
good for projects that have a cover sheet or something similar that
does not require a page number.
You can also uncheck the option to
include a page number on page one. This will set the first
page to be numbered page 1, but the page number will not appear.
Page two will be numbered page 2.
Back to Designing and
Modifying a Project...