The Print Shop 3.5 User Guide
The Print Shop 3.5 is designed to help you learn the software.
Be sure to also check out the
Video Tutorials and the
Blog for
additional ideas. To access the User Guide, either click
on a topic to the left, choose a commonly accessed topic
below, or search for a topic above.

Photo & Clip Art Management

The My Photos Gallery contains a
collection of your own art and photos that you have imported and
saved to the My Photos Gallery. These will appear in the My Photos
Button in the Object Toolbar.
To better organize your Art and
Photos, you can Tag Your Art and
Photos, mark your art and photos as favorites, and delete art and photos in the My Photos
Gallery.
Note: This option is only available to
Art and Photos you have saved to the My Photos Gallery. See
importing a photo for how to add an image to the My Photos
Gallery.
Tagging Art and Photos
To make searching through your
projects easier, you can add tags or keywords. To Tag a project do
the following:
- Click on the My Photos Button. The My Photos Gallery is
displayed.
Note: If you do not see your image listed make sure that the
search bar is empty and click on search.
- Click on the Actions menu below the image preview.
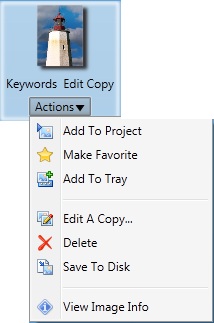
- Click on View Image Info option.
- This will display the Image information dialog box.
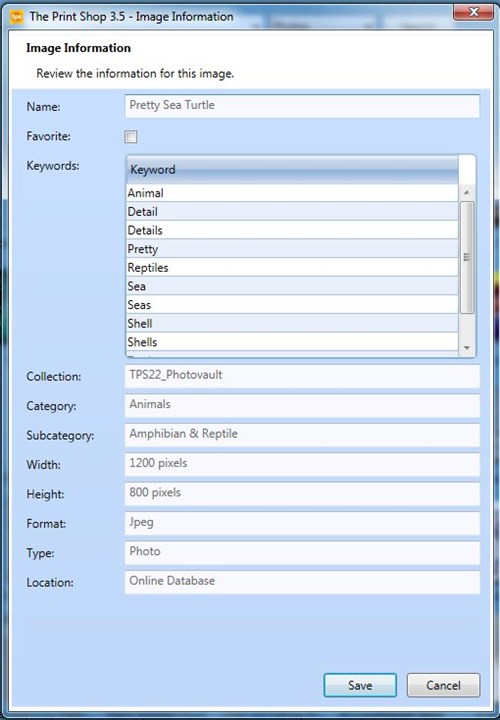
- Type the keyword into the User Tags dialog. Click Add after
each keyword.
Examples are: Birthday, Wedding, name of person, etc.
- Repeat step 5 for each keyword you want to add.
- Click on Save when you're done.
Mark an Image as a
Favorite
To Mark your project as a favorite
makes your project appear at the top of the search results list so
that it can be searched for easily. To mark a project as a favorite
do the following:
- Click on the My Photos Button. The My Photos Gallery is
displayed.
Note: If you do not see your image listed make sure that the
search bar is empty and click on search.
- Click on the Actions menu below the image preview.
- Click on the Make Favorite option.

Delete an
Image
If you do not need an image any more,
you can delete it from the My Photos Gallery. To Delete an image do
the following:
- Click on the My Photos Button. The My Photos Gallery is
displayed.
Note: If you do not see your image listed make sure that the
search bar is empty and click on search.
- Click on the Actions menu below the image preview.
- Click Delete.
Return to Working with
Images...
or view the using clip art tutorial by clicking HERE.
