Headline Text Tools

Changing the
Headline Font
To change the Headline Font, start
by Adding a Headline.
- Click the Headline you want to edit, the Headlines Tab becomes
active.

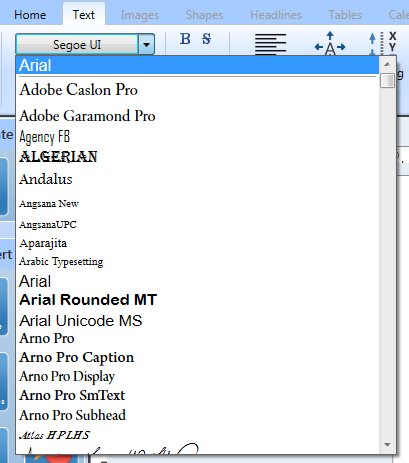
- Use the drop down box to change the font.

Please Note: The
available Fonts will depend on the fonts that are installed on your
computer. The screenshot above is NOT
representative of Fonts that come with The Print Shop 3.5
Changing The
Headlines Color
To change the Color of a Headline,
start by Adding a Headline.
- Click the Headline you want to edit, the Headlines Tab becomes
active.

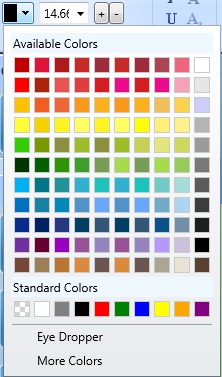
- Use the drop down box to change the color.

Changing the
Headline Size
To change the Size of a Headline,
start by Adding a Headline.
- A Headline's size is determined by its bounding box.

- Click and drag on any of the dots around the edges of the
bounding box to increase or decrease the size of its box. The
text inside will resize automatically.
Changing Headline Proportions
Headline proportions effect multi-line
Headlines. The effect that they create is to make selected
lines of text slightly larger to add emphasis. To add a
proportion to your headline, start by Adding a
Headline. Once a Headline is inserted you can
set the Alignment by doing the following:
- Click on your Headline.
Note: Your Headline must have multiple lines of text for you to
notice a change.
- On the Headlines Tab click on Proportions.

- Using the Proportions preview bar choose one that fits your
need.

An example of the effect in use is
shown below. The headline on the left is set to the default
Proportions. The one on the right is set to a different
proportion.

Changing the Headline
Alignment
To change the the Alignment of
the Headline Text, start by Adding a Headline.
- Click on your Headline.
- On the Headlines Tab click on Alignment.

- Using the Drop Down menu you can choose from Left, Right,
Center, or Justified.
Note: The changes made to
headlines are subtle since the text will always resize to the size
of the text box. The time when it will be most noticeable
will be when the text is in a Vertical Direction or the Headline
has multiple lines in the same box.
Changing
the Headline Direction
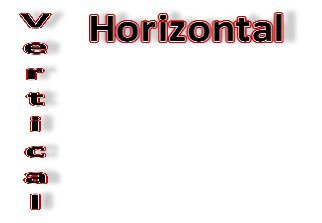
The Direction of a headline determines
if the headline appears Horizontal or Vertical.

To change the Direction of
your Headline, start by Adding a Headline. Once a
Headline is inserted you can set the Direction by doing the
following:
- Click the Headline you want to edit, the Headlines Tab becomes
active.

- Click on the Direction Button.

- Change the Direction to either Horizontal or Vertical from the
drop down menu.
Changing
the Headline Kerning
To change the Kerning of the text
inside your Headline, start by Adding a
Headline. Once a Headline is inserted you can
set the Kerning by doing the following:
- Click the Headline you want to edit, the Headlines Tab becomes
active.

- Click on the Kerning Button
- Use the slider tool that currently is set to the Default
Kerning and set it to your preferred Kerning.
Return to Working with
Headlines...