Adding Clip Art

To add clip art to a page:
- Select a page in the Page Thumbnails.
- Click on Clip Art in the Ribbon Tabs and click on the
Add Clip Art icon. You may also choose
Insert > Add Clip Art from the
menu, or click on the Add Clip Art icon
 on the
toolbar to add clip art.
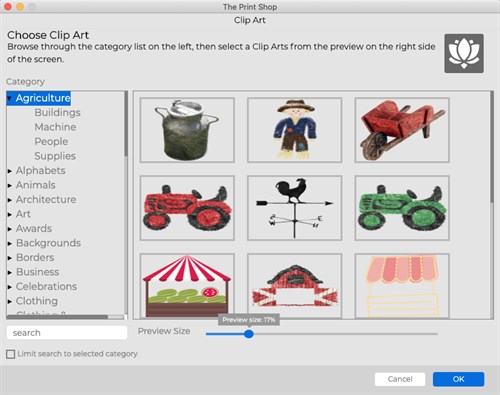
- The Choose Clip Art window opens.
- In the Choose Clip Art window:

- Click on a category name in the left column (double-click on
the category name or click on the plus sign or arrow symbol to
expand categories). Available clip art will appear in the right
column.
- To get a more detailed view of the clip art, drag the Preview
Size slider under the Preview area at the top right. Drag the
slider to the left to see more clip art.
- Click on an item in the right column.
- Click on the up or down arrows next to Quantity to add more or
fewer of that type of clip art (up to ten of one type at a time).
Alternately, type a number between 1 and 10 in the box to change
the quantity.
- Click on the Add to Favorites button to save the currently
selected clip art to the Favorites category.
- The Search field allows you to find clip art by keyword or
name. Check the Search selected category only box to limit the
search to the category that you are currently viewing. Click on the
X icon to clear the Search field.
- Click on the Browse other… button to add one of your own files
to the currently selected project page as clip art. Select the file
in the new window and click the OK button. It will be added
immediately to the page, although the Choose Clip Art window may
prevent you from seeing it until closed.
- Click on the Apply button to add the clip art to the page. The
Choose Clip Art window stays open, allowing you to add more clip
art.
- Click the Close button to close the Choose Clip Art
window.
Clip Art
Or
Editing Clip Art