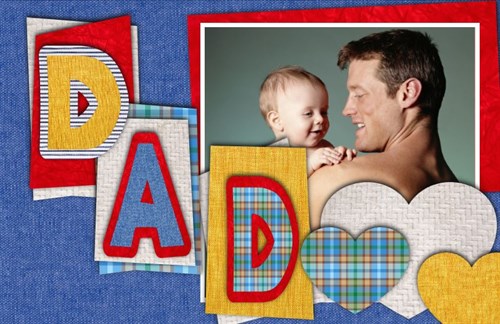
This cute card for a first-time dad,
was fast to make because I used a ready-made card template.
Nothing makes it more special and unique than adding a
personal photo.

I will give you some tips
for editing a ready-made template so you can apply these techniques
to make your own special cards.
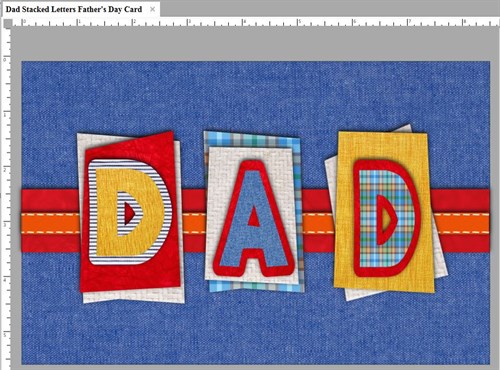
I started by opening the
greeting card project Dad Stacked Letters Father's Day
Card. It's nice on its own, but for the dad in
our photo, he's going to get an even better card.

You can see
that the final design uses almost everything from the original
design. In fact, I don't add anything from the clipart
gallery.
Tip #1: Lock items that you
want to keep exactly as is.
When you
select an item, an open padlock appears in the upper right
corner. Click it to close the padlock. This locks the
item so it doesn't move around or get accidentally selected as you
work on the rest of the page.

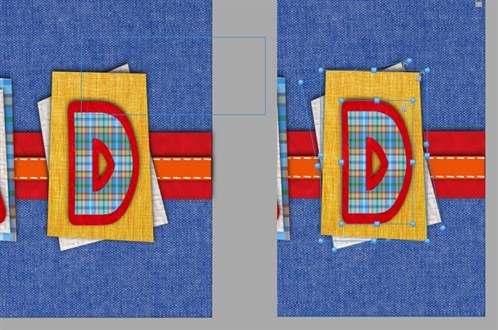
Tip #2: Grab several items at
once and move them.
This is a real time saver! From
the outside of the project, drag to form a rectangle that touches
every item you want to grab. When the mouse is released, you
see the grabbed items selected. Click and drag this group to a new
position. Because the blue texture is locked, it wasn't
included in the grab.

Tip #3: Change a
shape.
You can switch from a
given shape to any shape in the shapes menu, and still retain all
of its effects such as image fill and
shadow.
For this card, I wanted
to add heart shapes with the same image fill and shadow as some of
the "pattern paper pieces". By creating a copy of the item
(click the item, Ctrl-C, Ctrl-V), I can turn that copy into a heart
shape. Click the Change shape button to bring up the different
shapes, then click the heart
shape.

Now you can see
where I have copied items and turned them into hearts on top of my
photo,and a matte under my photo. Everything coordinates so
well that I didn't have to go looking for more
clipart.

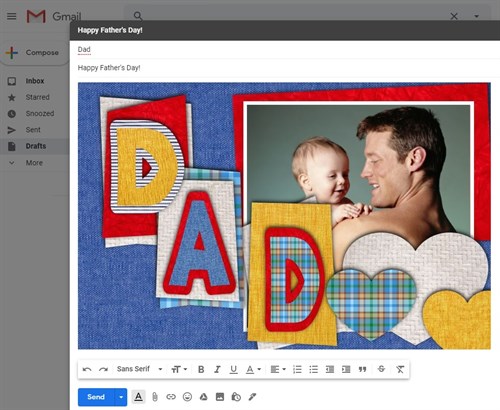
Tip #4: Make a JPG to insert
into an email or social media post.
It's great to give
Dad a real card, but you may also want to email it or post it on
Facebook, so you will need a JPG
version.
In the Print
Preview, zoom in to get the size you want, then use Windows
Snipping Tool to snip the card front, and to save as
JPG.


written by lindarobin