When a printed paper form best suits
your purposes, The Print Shop can help you design your form.
Additionally, it can be saved as a PDF and sent by email. In
this demonstration, I'll show you how to use the Table feature to
create a simple invoice form.
Open a new blank project. Add a
table by clicking the Table icon.
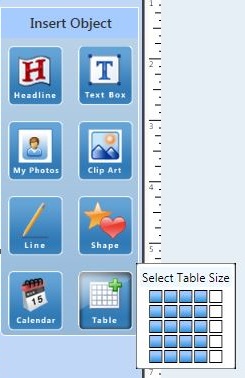
Make a quick selection by moving your
cursor to a position in the Select Table Size grid. Here I've
selected my table to be 4 columns and 5 rows. Don't worry,
columns and rows can be added or deleted as needed.
A table appears on your project.
Notice the Tables tab opens, showing you the table options.
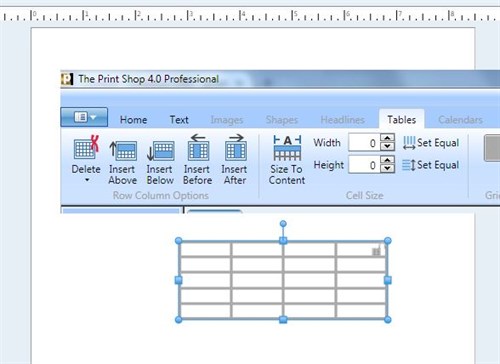
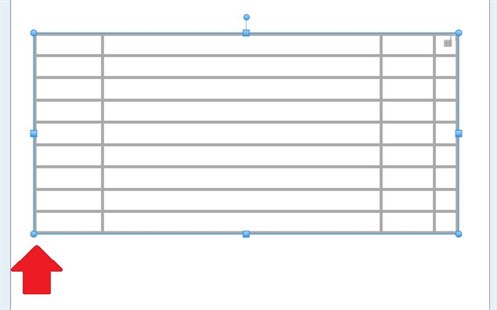
Resize and position the table.
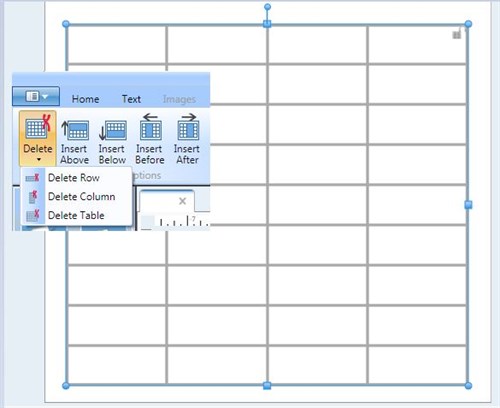
Insert more rows and columns, or
delete the extras.
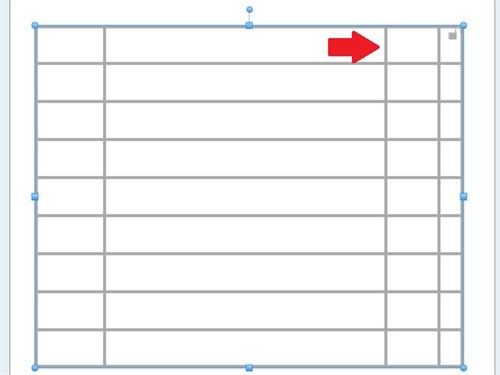
Hover the cursor over a vertical line
until the double-headed cursor appears. Drag the vertical
lines left or right, to customize the width of the columns.
Hover over the corner node until a
double-headed cursor appears, then drag up or down to resize all
the row heights equally. (You can make individual rows taller
or shorter by hovering over a horizontal line until a double-headed
cursor appears, then dragging the cursor up or down.)
See the Cell Size section for more
ways to change cell size.
Double-click inside a cell and type
inside it. The options in the Table toolbar, let you format
the text, as well as the cell fill, and the grid lines.

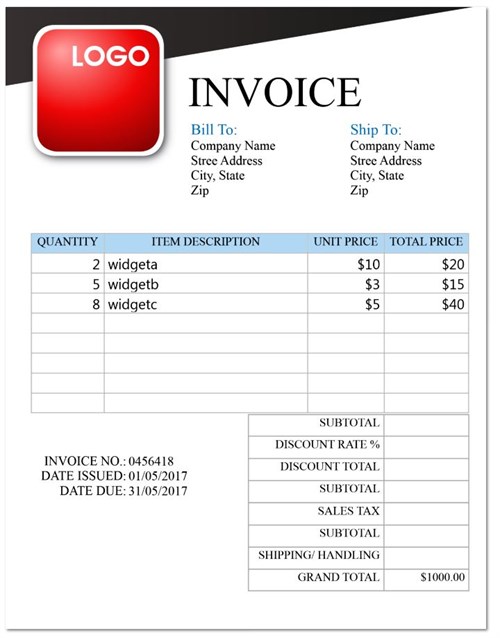
Your form can have more than one
table:
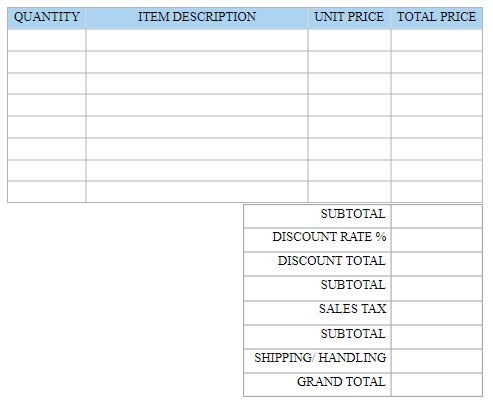
Add your logo and text boxes and even
a background. Save your invoice template. It is ready for you
to enter data into the tables.
(If you require an online form
solution, check out the free Google Forms which can link your form
results to a Google Sheets spreadsheet for analysis. Encore
also sells
FormTool, for designing e-forms with FormTool Filler/Data
Manager.)
written by lindarobin
