Spring is coming and so are summer
weddings! Thinking of making your own wedding invitations
with The Print Shop 4.0? Here are some ideas, and my personal
tips, for keeping it simple to design and print.
I recommend making single panel 5x7
cards. They are a wedding invitation classic without the
complications of double-sided folded cards. You can get two
cards printed on each sheet of 8.5x11 card stock, and you can buy
envelopes that fit them which only require one postage stamp.
Start with a new blank Sign
project, landscape orientation.
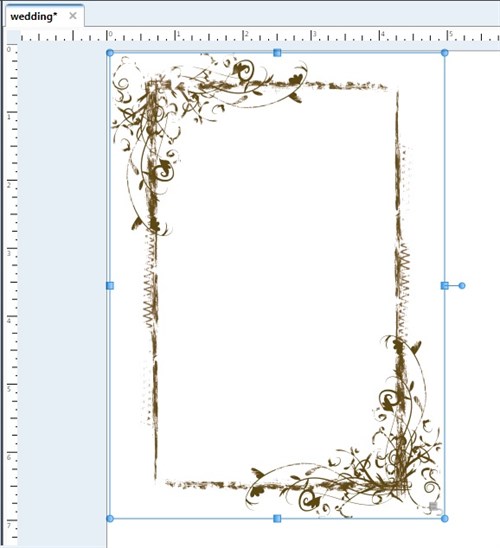
I chose a lovely frame from the
ClipArt gallery, "Stamped Photo Overlay Ornate Brown". I
moved it over to the upper left of the page so I could drag it to a
5x7 size using the rulers as my guide.

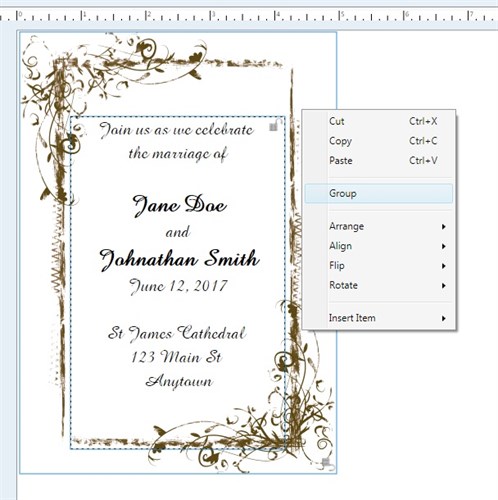
I added my text box and typed the
invitation. It's a fancy font that is not too scripty, so
that it is easy to read.

Now comes the part where we want to
get two invitations on the page. Select everything and Group
it into one element.

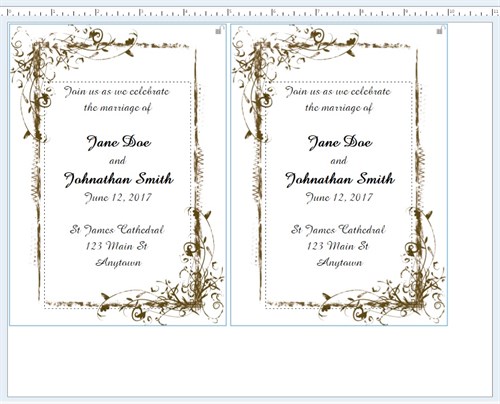
Copy and paste the group.
Arrange the two groups side by side. You can see that they
cover a 10x7 area.

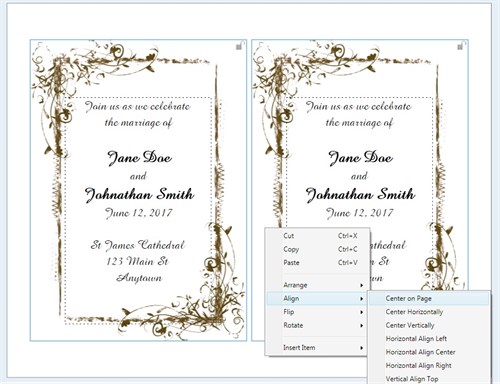
Select all and group again, so you
have one group. Right-click this group and Align - Center on
Page.

You are ready to print.
By positioning the group in the center, I can cut
apart my two cards and trim them to 5x7 size, and get a full-bleed
look. (If I had left the design close to the edge of the
paper, my printer would have cut off some of the image.)
Here is another tip: Print onto
colored card stock if you find plain white too "blah". There
are some beautiful colored card stocks that look like parchment, so
that your final card, after trimming, can look like this:

Using a textured colored card stock
can give your invitation a sophisticated look and minimizes the
amount of ink you actually need to use.
I hope this tutorial helps you plan
your wedding invitation design. Congratulations to the happy
couple!
written by lindarobin