
Mail Merge

With Mail Merge you can crate
documents that have Merge Fields, then print or export to labels,
envelopes, invitations, etc. using information in your address
book.
Insert Merge Fields
To insert a Merge Field create or edit
a Text object. Using the Merge Field list in the Text ribbon you
can add field to the text box. After adding the field click into
the text box to add a space, comma, or new line depending on how
you would like the text to be configured. Add more merge fields as
desired.

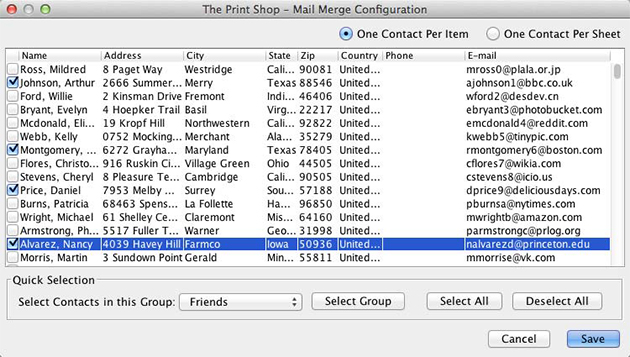
Define Merge Contacts
Once you have your document setup with
Merge Fields you will want to define your Merge Data. Click the
Setup Mail Merge button to define your merge data. You can merge
your entire contacts list, a group, or select individual contacts
to merge by placing a check in the box next to the contact.
Print/Export Mail Merge
When you either Print or Export, Print
Shop will detect that you have merge fields in your document and
ask you if you would like to perform a mail merge. Choose yes to
process your mail merge.

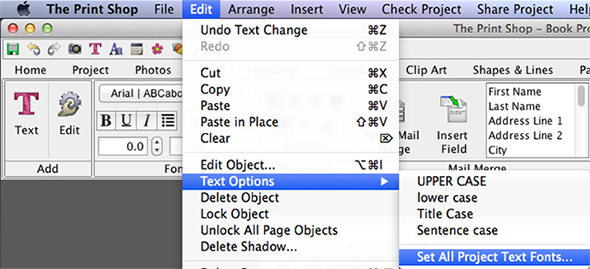
Change all project font / styles
You can now apply Fonts and Styles to
all text boxes in a project.
- Open the Edit menu. Select Text Options from the drop
down.
- Select Text Options from the drop down.
- Then select Set All Project Text Fonts.
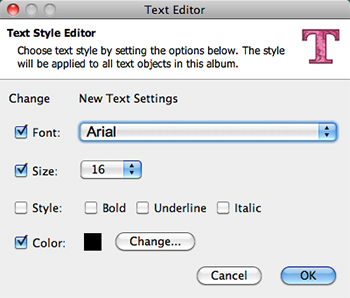
- In the Text Style Editor dialog select your new font, size,
style & color.
- Click Ok to apply the change to all text within your
project.
Text Tracking (Kerning)
- Select a text box with text inside of it.
Edit the text tracking by click on the
up or down arrows next to Text Tracking, located
in the Text tab in the Ribbon Tabs (top of The
Print Shop).
Text Case Tools - Upper case, sentence
case, etc
You can now change a text box to all
upper, lower, sentence, or title case by selecting a Text objection
then clicking the Edit menu and choosing Text Options
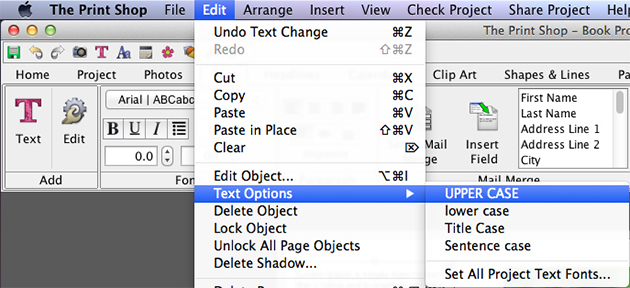
Change Text Case
- Select the text box with a left-click
- Go to the Edit menu / Text Options
- Choose your desired Case style
Change Text Case
- Open the Text tab in Ribbon Tabs
- Click on the Add Text icon
- Enter some lines of text into your text box
- Exit the Edit Text mode by deselecting the text box
- Select the text box with a left-click
- Go to the edit menu / text Options
- Choose your desired Case style
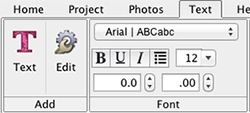
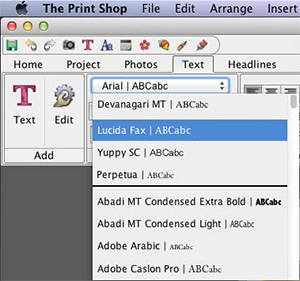
Recently Used Fonts and Type to Select
Fonts
In the Text control panel the Fonts
drop down menu now supports 5 recent fonts that will automatically
appear at the top of the list as you apply different fonts to Text
objects. You can also click the drop down and start typing the name
of the font and the menu with jump to the font, this saves time
instead of having to manually scroll large font lists.
Text Remove
Clicking on this button will delete
the selected text box.
