
Project Output Preparation

The Print Shop provides flexibility
when outputting your project: printing your project, saving project
pages as JPEG files, uploading the project to be printed as a photo
album, and more.
Careful planning is necessary to take
full advantage of this flexibility. Please take note of the
following considerations when designing a project:
- Print - Pay close attention to the paper size of the project
type you select when creating a project. Many projects use a paper
size other than the standard 8.5" x 11" paper.
- Photo Album - The photo album creation process will trim up to
¼" per project page side.
The Print Shop provides two primary
tools to assist with project output preparation and checking.
Bleed Area
The Print Shop bleed areas are the
best method for checking which portions of your project may be
trimmed.
- Click on the View menu and position your cursor over the Bleed
Area option.
- From the submenu that appears, choose the option that
corresponds to your output type.
- The gray areas around the outside of project pages indicate
where the project will likely be trimmed. Any critical objects
(photos, clip art, shapes, titles, etc.) should be kept out of
these gray shaded areas. The bleed areas are not exact, and should
only be considered estimates - it is always wise to allow a little
extra space as a margin of error.
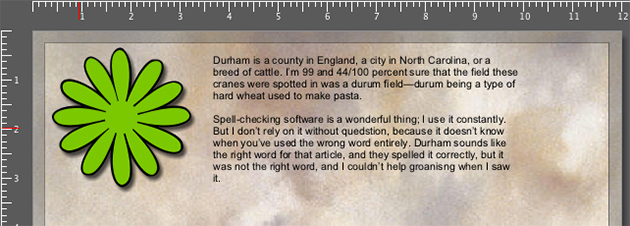
Rulers
Rulers can also be helpful in
determining which parts of a project page may be trimmed. To
display rulers, choose View >
Rulers from the menu.
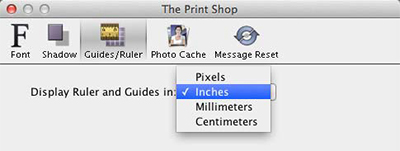
To change the ruler units and size,
click The Print Shop menu and select Preferences. Click on the
Grid/Ruler tab. Choose the default ruler units from the Display
Ruler and Grid in drop-down menu and click OK.
To prepare for printing, choose the
units that best correspond to the size of the paper (usually
inches). To change the size of the project, choose Edit > Change
Project Size/Type from the menu. Finally, choose a size from Sizes
drop-down menu or adjust the Width and Height numbers until both
dimensions are equal to the intended print size.
Printing Business Cards
Before printing business cards, you
may want to create an Avery sheet. See the Avery
Template Support topic for more information.
