Font Tools

Changing the Font
To change the font first insert a
text box. Once a text box is inserted you can set the font by
doing the following:
- Click the Text you want to edit. The Text Tab will then
become active.

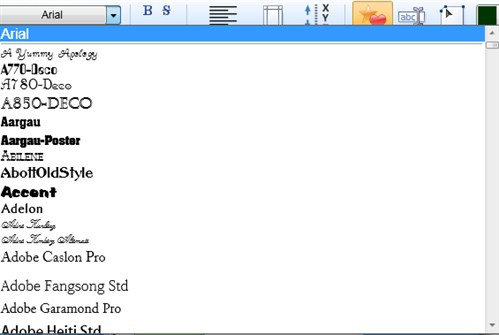
- Use the drop-down box to select the font you want to
use.

Note: You can also change parts
of your text by highlighting that portion of the text with your
mouse then following the steps above.
Please Note: The available Fonts
will depend on the fonts that are installed on your computer.
The screenshot above is NOT representative of Fonts that come with
The Print Shop 3.0.
Changing the Text
Color
To change the Text Color start
by inserting a text box. Once a text box
is inserted you can set the color.
- Click the Text you want to edit. The Text Tab will then
become active.

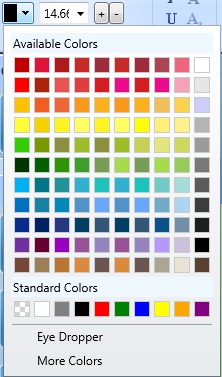
- Use the drop-down box to select the color you want to
use. You can also use the Eye Dropper tool to select a color
from anything you click on, or the white and grey checkerboard
color to choose a transparent color.

Note: You can also change parts
of your text by highlighting that portion of the text with your
mouse then following the steps above.
Changing the Text
Size
To change the size of the text start
by inserting a text box. Once a text box
is inserted you can set the text size.
- Click the Text you want to edit. The Text Tab will then
become active.

- Use the drop-down box to select the size you want to use, or
use the + and - buttons to increase or decrease the font size
of your text.

Note: You can also change parts
of your text by highlighting that portion of the text with your
mouse then following the steps above.
Using
Text Font Styles
The following text styles can be
applied to your text in The Print Shop 3.0.

Return to Working with Text...