
Aligning Objects

Page Guides
To ensure accuracy when aligning
objects, guides can be placed on the Page Canvas
Adding Guides
- Enable Rulers, either from the View menu / Rulers or Project
Tab
 icon.
icon.
- Enable Guides, either from the View menu / Show Guides or
Project Tab
 icon.
icon.
- Position your cursor over either the top or side ruler,
left-click where you want to place a guide on the ruler.
- You may adjust the position of the guidelines by placing your
cursor over the line on the ruler, left-click and hold, then drag
the line along the ruler to the new position.
- You may also add multiple guides by left-clicking other
locations along the ruler.
- To remove a guide from your page, drag it off of the ruler bar.
Or disable from view / show Guides.

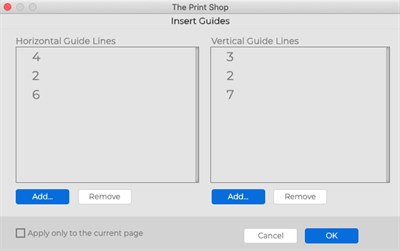
Guide Manager
With the Guide Manager you can create
guides at specific positions, distribute evenly across page, save
guide layouts as a template, and apply guide templates to
projects.
Creating Guides
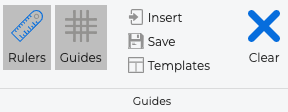
Enable Guides by click the Guides icon
in the Project Tab. Then click Insert. You can define Horizontal
and Vertical Guides by clicking the Add button. When done click ok
and the guides will be applied to the project.
Saving Guide Template
If you have created a set of guides
that you want to be able to use on other projects you can save the
guides as a template by clicking the Save icon.
Opening Guide
Template
If you have saved guide templates you
can apply them by clicking the Templates icon.
Removing Guides
To remove guides press the Clear
icon
Guides will not appear in the final
project output (print, JPEG output, etc.).
Align Menu
Another way to align objects on the
Page Canvas is with the Align menu item. The first six and last two
options align selected objects in reference to each other. The
other two options align objects with respect to the page.
- After selecting one or more objects, choose
Arrange > Align from the menu
(also available from the right click menu).
- Using the submenu that appears, choose from the list of
available alignment options:
- Top: Aligns all selected objects to the topmost object on the
page.
- Middle: Lines up the vertical middle of each selected
object.
- Bottom: Aligns all selected objects to the bottommost object on
the page.
- Left: Aligns all selected objects to the leftmost object on the
page.
- Center: Lines up the horizontal center of each selected
object.
- Right: Aligns all selected objects to the rightmost object on
the page.
- Center Vertical : Places all selected objects in the vertical
center of the page.
- Center Horizontal : Places all selected objects in the
horizontal center of the page.
- Space Evenly - Horizontal: Arranges the currently selected
objects so that they all have the same amount of horizontal space
between them.
- Space Evenly - Vertical: Arranges the currently selected
objects so that they all have the same amount of vertical space
between them.
Moving Objects
Or
Grouping Objects
