
Editing Shapes

To begin editing a shape, click on it.
The Shapes and Lines section of the Ribbon Tabs will open, showing
the available functions. Refer to the description of the functions
below the image:

Add Shape
This is the same as choosing
Insert > Add Shape or Line
from the menu. See Adding Shapes for more information.
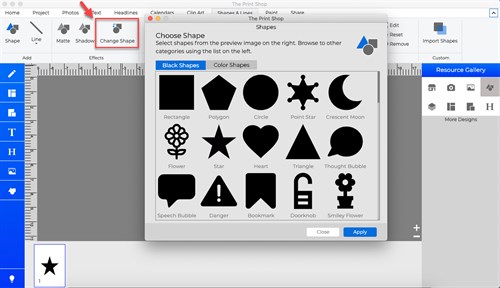
Change Shape to a Different Shape
- Select a shape on your page with a left-click.
- Under the Shapes and Lines tab in Ribbon Tabs click on the
Change Shape Icon.
- In the Choose Shape Dialog, select a new shape, click
Apply.
Matte
Click on this button to add a matte (a
border or frame) to a shape, or to edit an existing matte.
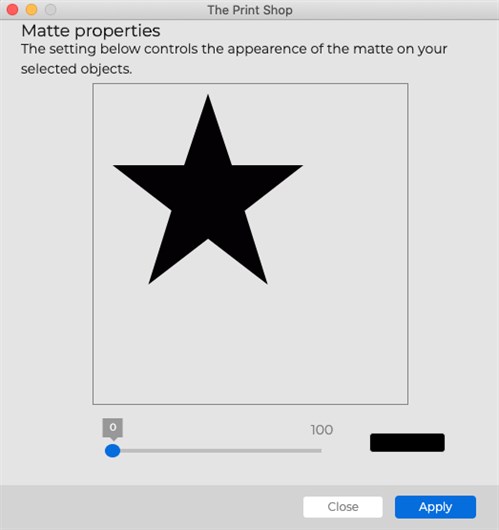
In the Matte Properties dialog:
- Drag the Size slider to change the size of the matte (the
numbers represent the width of the matte in pixels).
- Click on the Color square or the Change button
to choose a color for the matte. See Choose Color for more information.
- Click OK to apply the matte.
Drop Shadow
Click on this button to add a shadow
to a shape, or to edit a shape's existing shadow. A shadow makes
the shape stand out and gives it a sense of depth on the page.

In the Shadow Properties dialog:
- Drag the Size slider to change the size of the matte (the
numbers represent the width of the matte in pixels).
- Use the Opacity slider to affect how dark or light the shadow
is.
- Use the Blur slider to increase or decrease the sharpness of
the shadow's edge.
- Click on the Change button next to the Color
box to choose the shadow's color. See the Choose Color
topic for more information on choosing colors.
- Click on the shadow in the preview area to the top right and
hold the mouse button while dragging to adjust the shadow's
position. You may also use the arrow keys on the keyboard to nudge
the shadow.
- Click on the On this page box to add a shadow with the same
settings to each of the shapes on the current page.
- Click on the In this project box to add a shadow with the same
settings to all shapes on every page in the project.
- Click on the Reset to Default button to clear
the current settings.
- Click on the Save as Default button to save
the current settings as the default settings for shapes in The
Print Shop for Macintosh. To clear default settings, click The
Print Shop for Macintosh menu and choose Preferences, click on
the Shadow tab, check the Shapes and Lines box,
and click Reset to System Default.
- The Remove button is another method for
removing the shadow. This method allows you to remove shadows from
all shapes in the project, all shapes on the page, or the selected
shape. After clicking the Remove button, click on
your choice in the new window that appears.
- Click OK to place the shadow.
Rotate 90° Left/Rotate 180°/Rotate 90°
Right
Click on the Rotate 90° Left button to
rotate the shape 90° counter-clockwise, the middle button to flip
it vertically, or click the Rotate 90° Right button to rotate it
90° clockwise.
Rotate (by Degrees)
To rotate a shape, drag the slider to
set the angle of rotation. The number in the box at the top right
will show the angle in degrees (negative numbers represent
counter-clockwise rotation). Alternately, you can type a number
directly into the box at the right and hit Enter/Return on the
keyboard.
Black Shape
Click on this icon to change the color
of the shape to black. This will not affect the color of the
matte.
White Shape
Click on this icon to change the color
of the shape to white. This will not affect the color of the
mat.
Change Color
Click on the Change Color icon to
change the shape color. This will open the Choose Color window. See
the Choose
Color topic for more information.
Match Color
Clicking on this icon opens the Picker
tab of the Color Chooser window. See the Choose Color
topic for more information.
Shape Opacity
This allows you to make the shape
semi-transparent (the original state of the text is 100% opaque -
not transparent at all). Drag the slider to the left to make the
shape more transparent. Drag the slider to the right to make the
shape more opaque (less transparent).
Shape Mirror/Flip
Use these buttons to turn a shape into
its mirror image. Click on the left button
(Mirror) to flip the shape horizontally. Click on
the right button (Flip) to flip the shape
vertically.
Shape Edit
Clicking on this button will bring up
the Object Settings dialog, which allows you to make exact
adjustments to the size and location of the shape.
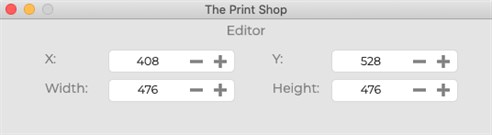
Click on the up or down arrows next to
each field or select a number and type in a new value to change the
settings.
- X - Changes the horizontal position of the selected
object.
- Y - Changes the vertical position of the selected object.Width
- Changes the width of the selected object.
- Height - Changes the height of the selected object.
- Keep Proportions - When checked, this option automatically
adjusts the height as you change the width, and vice versa, to keep
the shape from becoming distorted. Clear the check to allow
stretching.
- Other Shape Properties - The Object Settings window has
additional editing options for certain types of shapes. The options
below are available for the specified shape types:
- Line - line thickness
- Picture Frame - frame thickness
- Polygon - number of sides
- Rounded Corners - corner roundness (depth)
- Star - number of points, star depth
Shape Reset
Click on the Reset
icon to return the shape to its original state (the way it looked
immediately upon adding it).
Shape Remove
Clicking on the Remove button will
delete the current shape.
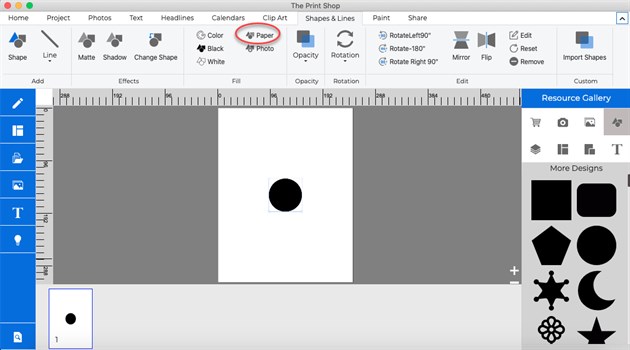
Fill shape with background image
You can now create a shape and then
use the Paper Fill button in the shape control panel to fill it
with a background paper.
Fill Shape with Background Image.
- Open the Shapes and Lines tab under Ribbon Tabs.
- Click on the Add Shape Icon
- Select a shape from the Choose Shape dialog window, and then
click Apply.
- Close the Choose Shape dialog window.With the shape
selected click on the Paper Fill Icon in the Ribbon Tabs
panel.
- Select a Paper from the Choose Background dialog window, and
then click OK.
Adding Shapes
Or
Line Tool / Editor
