
Object Grouping Tools

When you group objects, they will
behave as one big object. This means that all the grouped
elements can be moved together as one without losing their
placement in relation to each other.
To Group Objects:
- On the Design Desk, select all the objects that you want to
group. To do this, hold down Shift and click each one. Each
selected object displays with handles.
- Click on the Home Tab.

- Click on the Group button from the Home Tab.
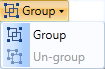
- Choose Group from the group menu.
The objects will then behave as one
object, displaying one set of handles around the entire set. You
can now move and rotate all the objects at once.
Note: You can add additional items to
your group by selecting both your Group and any additional objects
and then following the instructions above.
To Un-group Objects:
You can un-group objects that you have
previously grouped, allowing you to move, size, and modify each
object separately.
Note: If objects in a Ready-Made
layout project seem unresponsive when you double click them, the
objects may be grouped.
- On the Design Desk, select the group.
- Click on the Home Tab.
- Click on the Group button from the Home Tab.
- Choose Un-group from the Group menu.
Each object that was in the group now
displays with its own set of handles.
Return to Formatting Objects...
